Tuesday, 25 September 2012

Week 9 - Multimedia Authoring - Class Review

In week 9, we learned some technical skills for the improving and enhancing an images. How to give retouches to a picture using the blur tool, spot healing brush tool, patch tool, clone stamp tool, sharpen filters,  sponge tool, dodge tool, burn tool, etc. was all the part of the lecture session.

The clone stamp tool copies pixels from one area of an image and paints them onto another area. The healing brush tool is similar to the clone stamp tool, but produces a more subtle, blended effect. The patch tool is another very useful retouching tool. It works in a similar way to the healing brush tool,blending the sampled pixels with the pixels to be corrected. The dodge tool lightens the areas of an image, simulating decreased exposure and the burn tool darkens, simulating increased exposure. The sponge tool adjusts colour saturation to intensify or mute colours. Sharpening an image with the unsharp mask filter is always useful with images that have been resized or transformed. It is also used to improve the quality of an image when it is printed. The lens blur filter creates a shallow depth-of-filed effect, in which part of an image is in focus, but much of the image is out of focus.

We also practised the above mentioned effects on a picture that required some retouching. 

Wednesday, 12 September 2012

Week 6 - Multimedia Authoring - Class Review

This week we focused on a number of things, including working with filter gallery, combining applications of filters with selections, create custom textures, use liquify filter, working with text and paragraphs, how to insert an image into the background of a text.

Filters are basically special tool in the Adobe Photoshop that allow the users to add special affects to their images. They can be used in a number of ways. There are lots of options of filter selection in  the filter menu. Filter gallery shows a generic preview of the effects of each filter. Users can add more than one filter effect to  the same image.

The liquify filter allows the users to push the pixels around with the purpose of creating special affects. It is a great tool with impressive features. Users can distort the pixels by using the different types of liquify filter options. Users can also add the freeze mask tool to protect a specific portion of the image while editing. Users can also use the reconstruct tool to fix the picture back to its original version.

We also learned how to use vector shapes, using different types of shapes to create one combined shape.
We also learned some of the basic of using text. We learned how to pass an image into the background of an  text. How to alter the spacing between different letters and how to alter the baseline shifts. Learning how to change the alignment of paragraph was also part of the lecture session, we then practised our newly learnt skills in the tutorial session.  

Sunday, 2 September 2012

Week 5 - Multimedia Authoring - Class Review

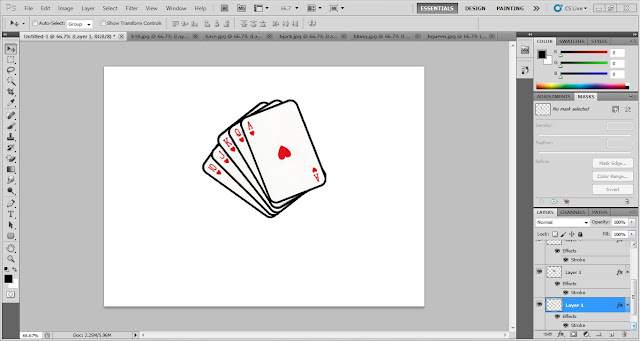
In week 5 we went into more depth of the Adobe Photoshop principles, Working with layers and layer styles is one of the most fundamental techniques of the Adobe Photoshop. Firstly we learnt about what layers are, what role do they play in picture editing and most importantly in Adobe Photoshop. Layers can be used for multiple purposes, example like creating composite images, creating complex projects, correcting colour effects, adding special effects and picture repairing. The contents of the layers can be controlled by any of the following:

1) Changing opacity
2) Changing stacking order
3) Changing blending modes

When several layers are combined together into one, than that's called merging. Layers functionality can be handled through the layer palette. It contains the blending mode, where a person can choose different type of blending effect, example hard light, linear burn, hue, saturation etc. The layer palette also has the layer visibility, where you can turn on and off the visibility of a particular layer. Turning off the visibility of the background layer shows the transparency that remains.
There are five different types of layers.

1) Normal Layers: These can be added on the top of the existing layer.

2) Adjustment Layers: This is used for altering or modify the picture without practically affecting the original                            
pixels.

3) Layer Masks: These have a function similar to the adjustment layer, however the difference is that it      
protects areas of the image not the pixels.

4) Shape Layers: These layers vector shapes.

5) Type Layers: These contain text elements.

After covering the types of layer, we moved on to the practical aspect of Layer i.e Merging and Flattening Layers. Merging as mentioned earlier is the combining of two or more layers. Flattening is the merging of all layers in a document with the purpose of optimizing the file size. Linking layers means moving them together as one unit.

Lastly we did a class tutorial session. In which we practised what we learnt in the lecture session. The tutorial contained questions that covered all the fundamentals about working on layers. From creating and adding layers to duplicating, merging, renaming, linking, blending, flattening, saving and reusing layers.